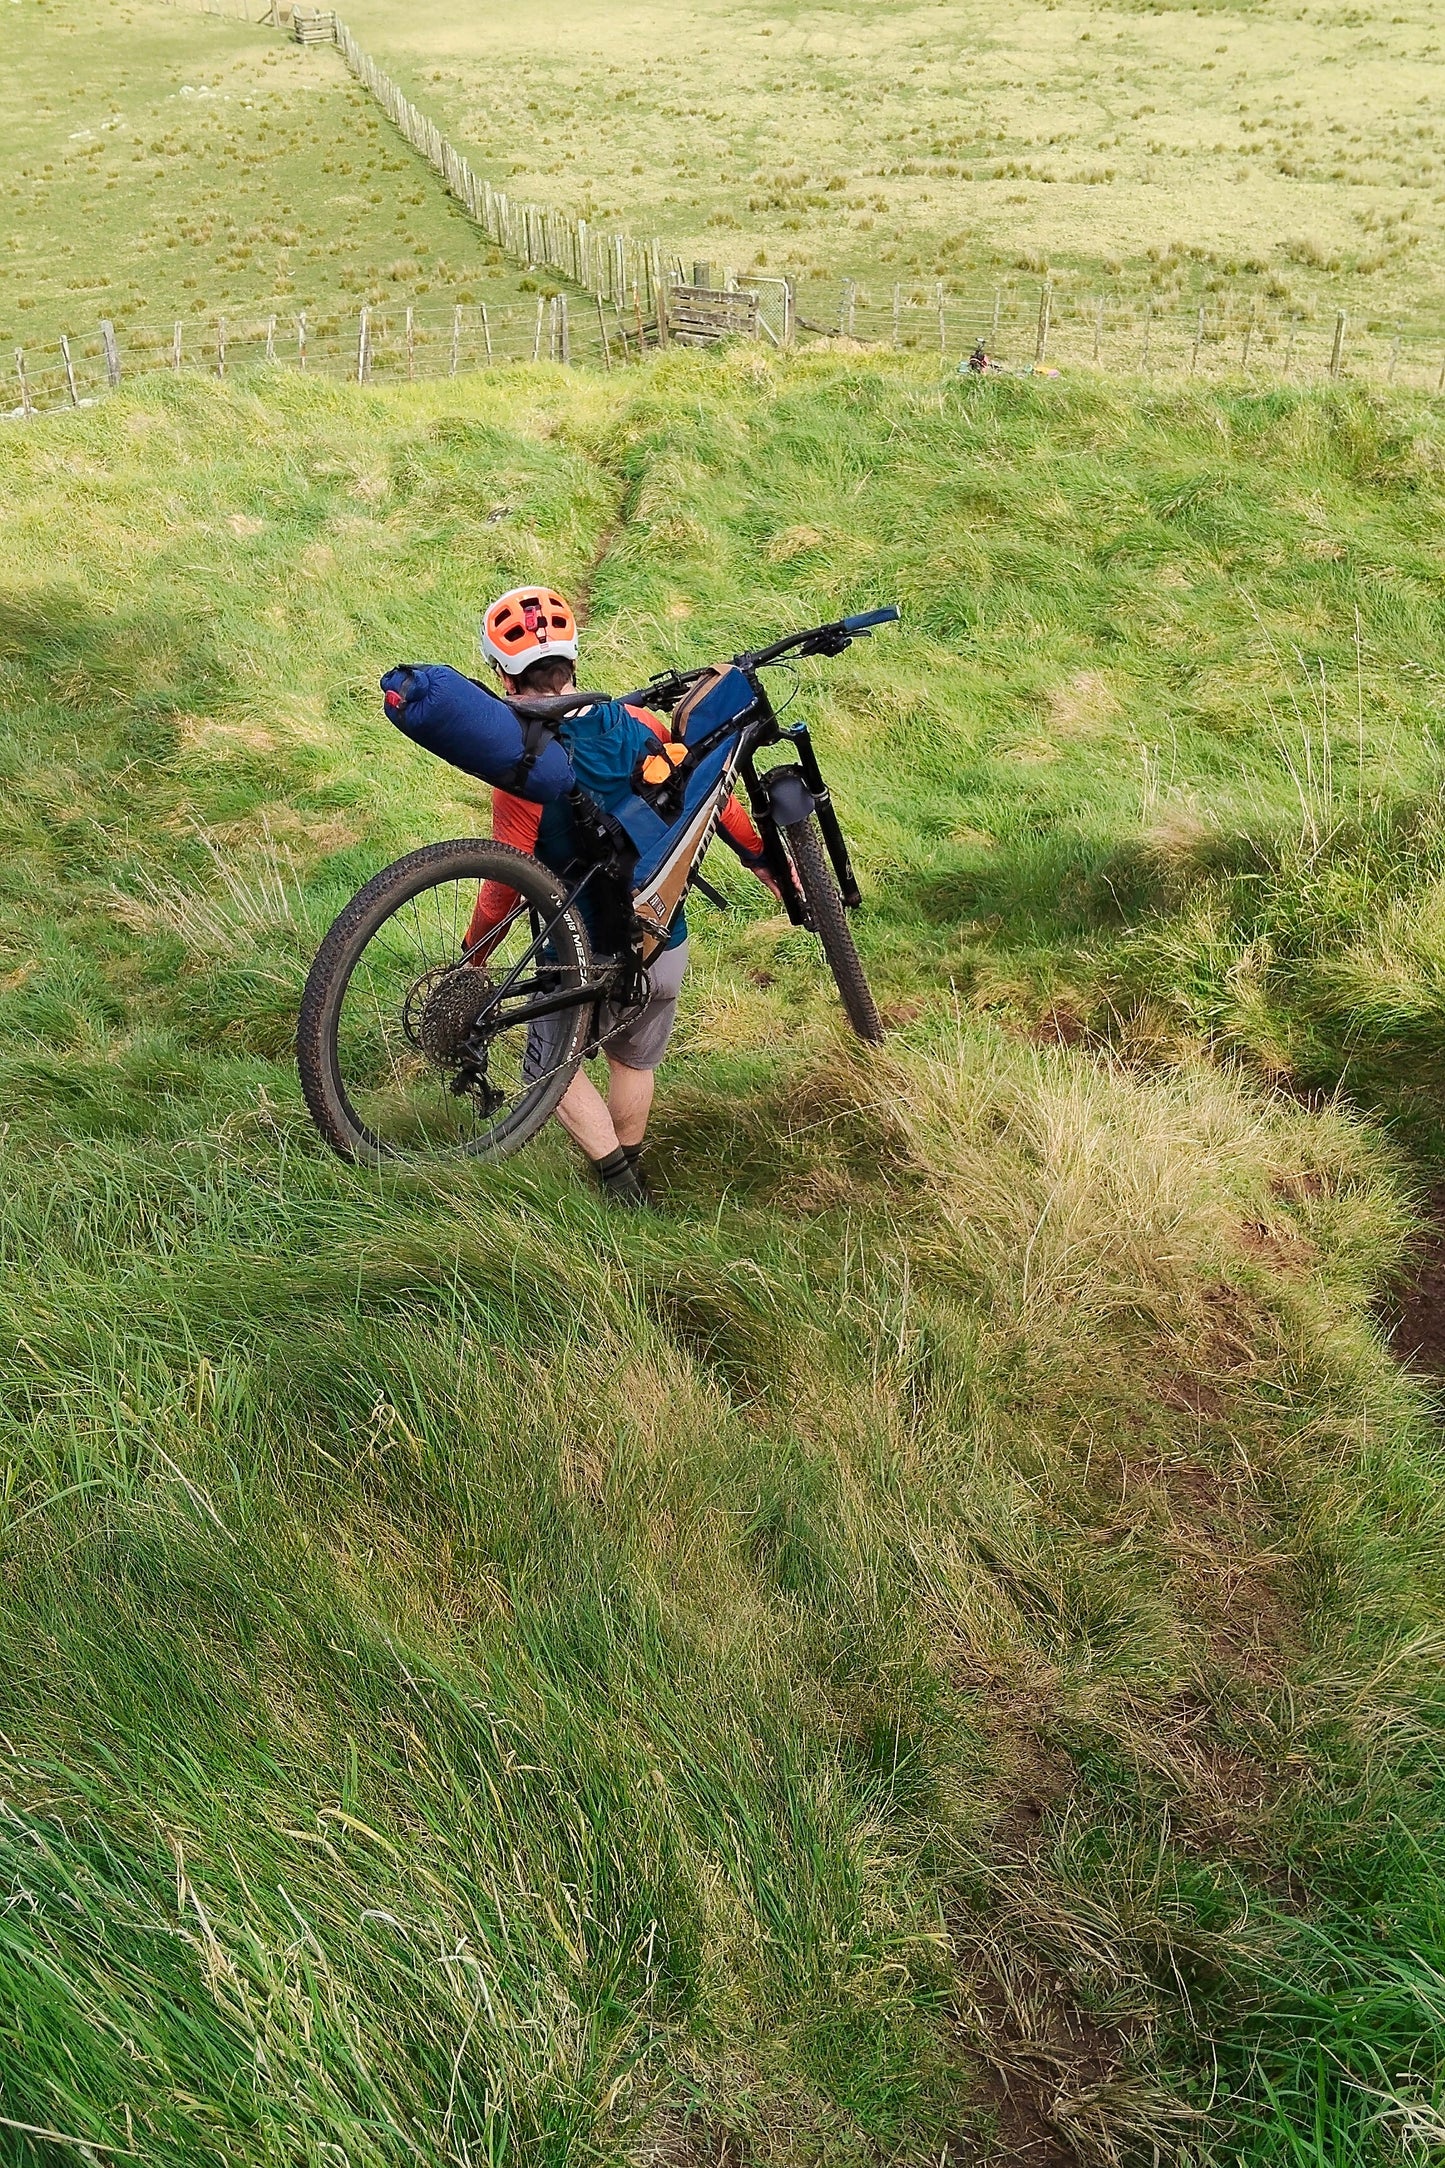
Hike-a-Bike Straps
Hike-a-Bike Straps
Couldn't load pickup availability
Paper Roads' Hike-a-Bike straps was born out of New Zealand's hardest bikepacking ultra race, Tour Te Waipounamu, and one of the most challenging bikepacking routes out of Sydney, Australia; Race to the Rock Entree.
- Field tested and developed on actual bikepacking hike-a-bike sections
- Packs down to the size of a spare tube and can be stored anywhere on the frame.
- Stuff sack made of ULTRA Stretch, a UHMWPE 4-way stretch fabric.
- Adjustable mounting points on the frame depending on the frame shape and how you want to balance the load.
- Plenty of adjustable extra strapping for extra tall riders at each 4 ends of the straps, or to accommodate backpacks.
- Cross-strap (makes a huge difference for support)
- Minimalist shoulder pads – the design allows a small amount of comfort for the task it's meant for.
- Fast hook on, hook off mounting points
- Made using 4 aluminium G-hooks rated at 114kgf tensile strength each (twice that of the G-hooks used for Prototype #1)
- Bungy & hook stabiliser, securing handlebars to the top tube preventing wheel movement, to enable hands-free bike carry (not shown in video)
The Story: Serious field testing
It all started with multiple requests for carry straps from Tour Te Waipounamu starters. A few very simple and rudimentary straps were made on request, with removable shoulder pads. One feedback from the aftermath was that one of the aluminium G-hooks had snapped during a several hour long hike-a-bike ordeal.
Amy at Paper Roads herself tested a pair of these Prototype #1 straps on Race to the Rock, where the firetrails were too steep to push with arm muscles that had already been burnt out, 3 days into the event. It was way easier to carry the bike uphills and switch up the riding muscles in the legs. However, when it came to crossing a gushing flooded ford, she opted NOT to cross with the bike on her back – and even then, resulted in a brush with disaster, almost swept downstream off her feet.
Further design exploration and field testing was carried out with Prototype #2, made using G-hooks with twice the tensile rating than the old ones. The second iteration was tested by Amy and Brent on a fast-paced night mission in Auckland's Waitakere hiking trails – a literal staircase up a mountain, an extreme test of endurance. The design was unsatisfactory when used under time pressure in semi-darkness, and the generous sized shoulder padding made it impossible to pack. Amy's poor installation resulted in a week of neck pain, so you'd be glad to know that sacrifices had been made to ensure the final product does not inflict injury. Here's the Instagram post of the overnighter.
The final Hike-a-Bike Straps solves all of the above problems, as well as the pack-down size issue apparent in existing carry straps from another brand.
Installation & Usage Guide
Installation & Usage Guide
WARNING: do not use Hike-a-Bike Straps to cross fast flowing streams or rivers unless you are sure there is no chance of getting swept away. This product requires a bit of common sense and fitness, but that's assumed you have some if you're attempting such exploits in the backcountry. Sometimes, "when you could, it doesn't mean you should".
- Set up the Hike-a-bike Straps before you set out on a mission that requires HAB. There are 2 shorter frame mounting straps for the top tube and a 3rd one that's longer, for the downtube. Position the top tube mounting straps about 10cm apart around the back half of the top tube, with the loops on the kerb side (you wear the bike on the non-chain side). Tighten through ladder locks. Do not install these as wide apart as your shoulders, this will cause strain and potential injury.
- If you have space on your top tube between the mounting straps, you can install the stuff sack here. Position the Voile strap in the middle and secure to the frame by cable tying it in place through the holes. Velcro on the stuff sack.
- Attach the 3rd, longer mounting strap to the downtube somewhere near the front end of the bike.
- Clip the short ends of the shoulder straps to the top tube mounting points, and the lower G-hook of the front strap to the downtube mounting point.
- The 4th G-hook on the very long end of the rear shoulder strap wraps around the chainstay and hooks back onto itself.
- Squat with your back to the bike and wear it on your back. Note the fit and make any adjustments to the strap lengths.
- When the straps are pulled to the correct lengths for you, and the shoulder pads sit properly, attach the cross-strap. You'll need to wiggle it into the webbing slot.
- The final step is to attach the length of shockcord with the cordlock hook to the top tube, for securing the handlebars with the front wheel twisted away from you. Simply feed the cord through itself to the top tube, loop the other end over the handlebars and clip to the hook.
- Test the loading and balance with the bike fully packed.
Share